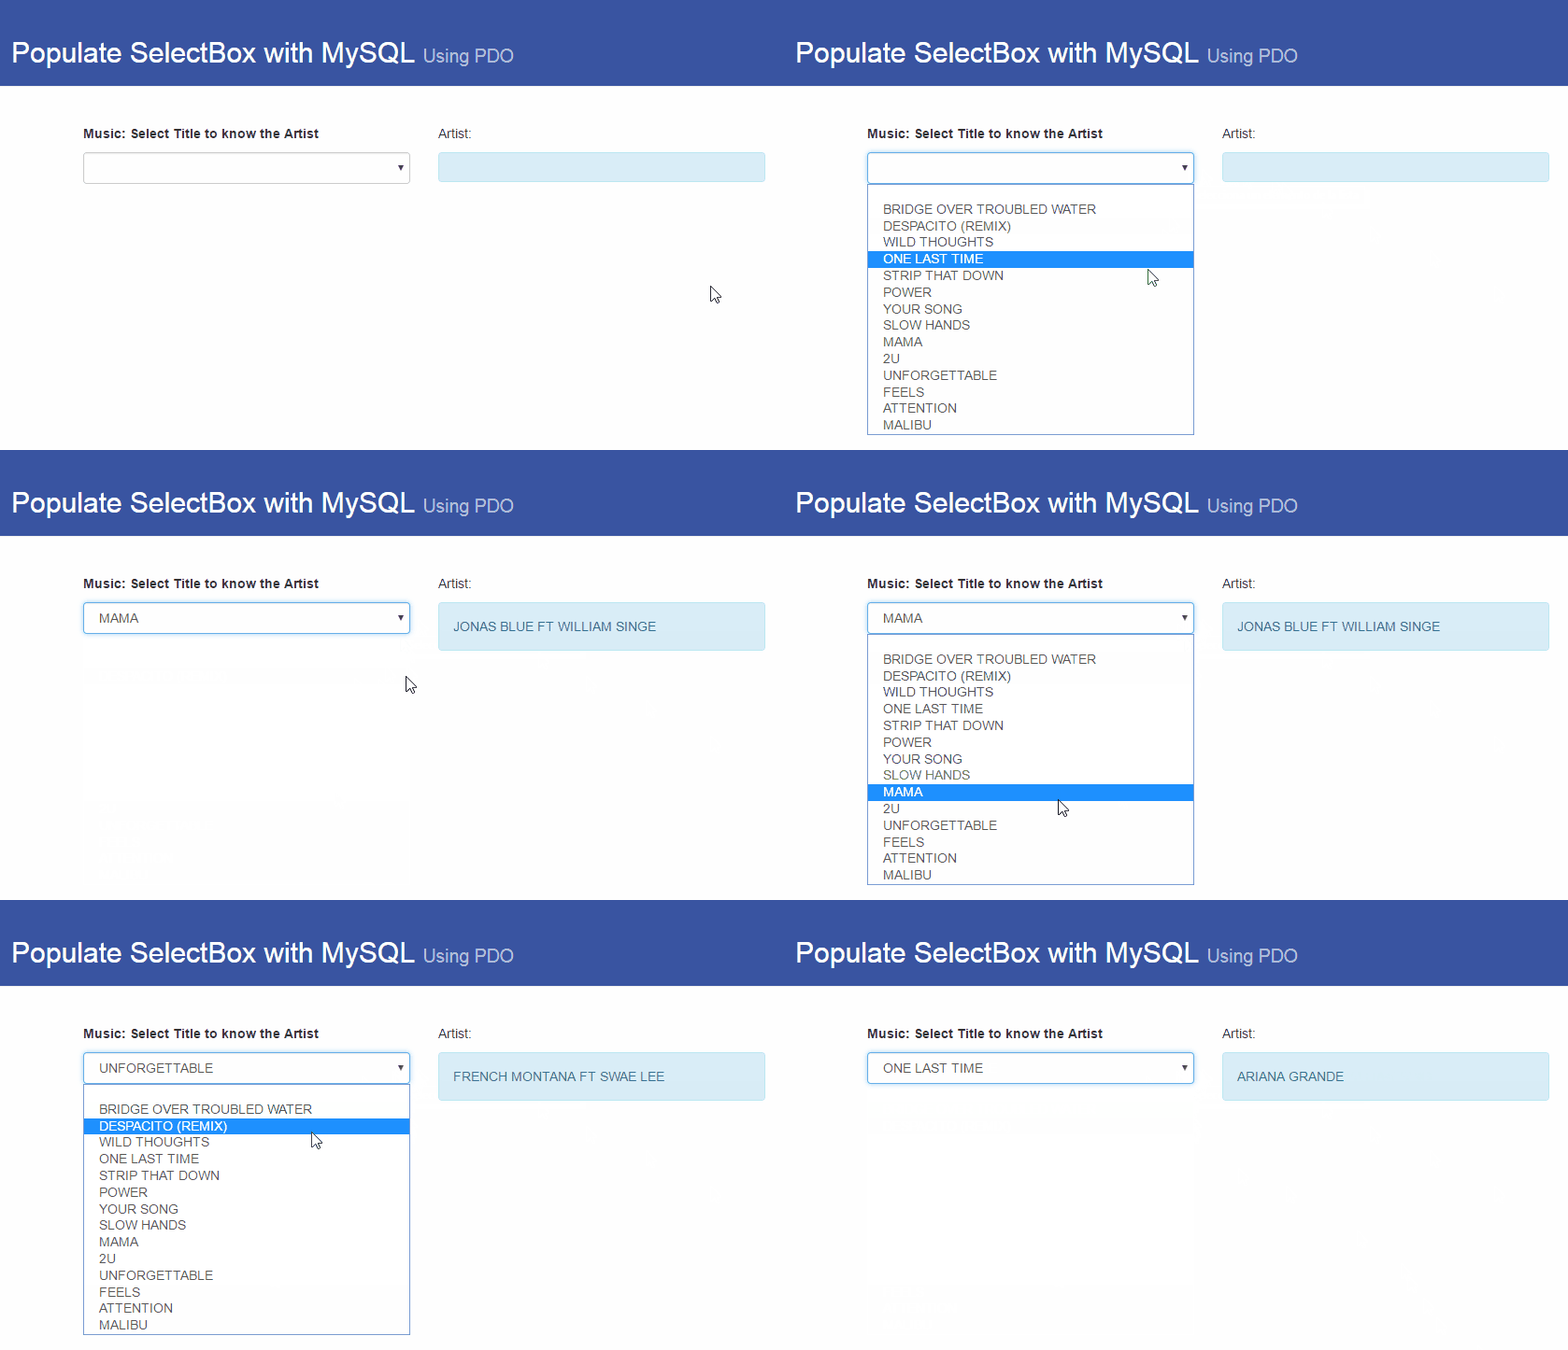
Imagine you have a database full of information, and you want to let users browse that data in the simplest way possible. Say you have a wide selection of data surrounding song titles & their artists, and you want to create a simplified search system that lets users select a song and instantly see who that song was by. You can accomplish with the help of PHP data objects (PDO), and a little bit of jQuery/AJAX.
For this PHP tutorial we’re going to recreate the above animation. Showing the artist information once a song title has been selected. The information will be pulled from a MySQL database via PHP and AJAX. The way it works, is when the page is loaded, a query is made to a database in order to acquire the list of music titles to be shown in the SELECTBOX. This information is stored in the $data variable, and the actual selectbox is populated via a FOREACH loop.
When the user selects something with the SELECTBOX, then jQuery detects a change in the SELECTBOX element and sends a post request to the server. This request runs a script to pull data from the database and send it back in JSON format. When the response is received, it is shown in a DIV with the “artist” id via AJAX/jQuery.
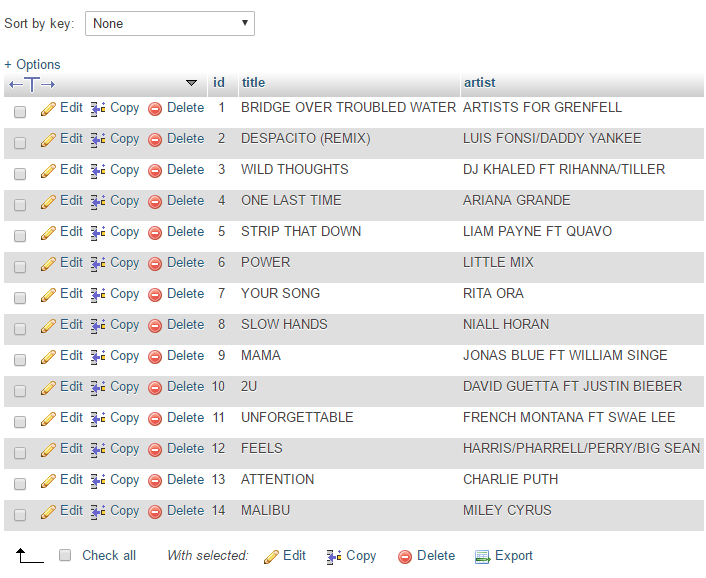
Here is an overview of the example database we will be using for this tutorial. If you wish to follow along you can download an .SQL file of this database here.
Let’s Get Started
We’re going to kick things off by setting up a way to actually connect to our MySQL database, and save that within a conn.php file. I won’t go into detail on how we’re going to do this, however I do have a full tutorial on how to connect to a MySQL database using PHP data objects which you can read.
Here is the code for our conn.php file. Take note that lines 11 & 15 are there for debugging purposes – should you wish to test your database connection.
setAttribute(PDO::ATTR_ERRMODE, PDO::ERRMODE_EXCEPTION);
        //echo "Connected successfully"."
";
    }
catch(PDOException $e)
    {
        //echo "Connection failed: " . $e->getMessage()."
";

    }
?>
With our database connection setup, we can start working on the meat of our script. Our index.php page which will hold our select box and information div. To properly utilize jQuery to update your information div without reloading the page, make sure to include a jQuery library. During the writing of this tutorial I utilize version 3.2.1. With that out of the way, we’re going to start selecting the initial information from our MySQL database to populate our selectbox.
prepare($sql);
	$stm->execute();
	$data=$stm->fetchAll(PDO::FETCH_OBJ);

?>
Having gotten the database info and stored it within the $data variable, we can now utilize a FOREACH loop to make our selectbox:
Music: Select Title to know the Artist
Now we just need to utilize jQuery to fire a custom script whenever our selectbox is updated by the user. So right before the closing BODY tag, we’re going to add the following jQuery code:
As you can see on line 79 we utilize $.post to make a call to our selectbox_query.php file. This is the one responsible for actually querying our database to get the information we want. This information is then sent over in JSON format, and our jQuery script above parses that data and displays it inside the #artist div. This would also be a good time to go ahead and create that div within your index.php file.
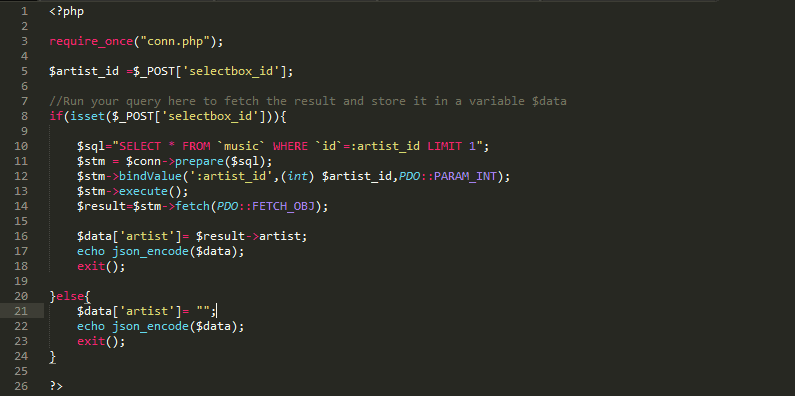
Now let’s setup our selectbox_query.php file. Here is the code we use, taking note that we’re including our conn.php file once more so we can connect to our MySQL database.
prepare($sql);
	$stm->bindValue(':artist_id',(int) $artist_id,PDO::PARAM_INT);
	$stm->execute();
	$result=$stm->fetch(PDO::FETCH_OBJ);

	$data['artist']= $result->artist;
    echo json_encode($data);
    exit();

}else{
    $data['artist']= "";
	echo json_encode($data);
    exit();
}

?>
As you can see we first check to see if a selectbox_id even exists. If it doesn’t the script simply sends back a blank. However if selectbox_id is provided, we query the database and select the appropriate information.
Feel free to download all the necessary code or make your own Git branch here. If you have any questions feel free to leave them down in the comments below.


nice info thanks
Website Development company Patna