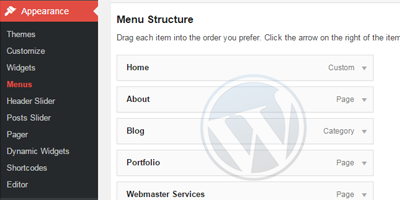
WordPress Menus can seem a bit confusing at first, and after having a friend recently get totally lost trying to figure out the menus for his website – I got the idea to put together this quick tutorial. First off let’s define some terms I will be utilizing throughout this tutorial. Menus are collections of links. Menu Locations are places within a WordPress website where you can place a Menu. You assign a Menu to a Menu Location. The confusion between the two often arises because it’s common practice among webmasters to name a Menu the same as the Menu Location where you’re going to put it. In reality this comes in quiet helpful in trying to figure out where a menu belongs 8 months after you’ve made it.
The names of Menu Locations are set by the theme, so for the primary navigation menu on the site one theme might use “Main Menu” while another uses the term “Navigation Menu“. The amount of menu locations available is also dependent on the theme you are using. Under Appearance -> Menus there is a Manage Locations tab which contains all the possible places in your theme where you could place your menu.
Linking More Than Just Pages & Categories
While the theme ultimately determines what menu locations are available, you can always assign any menu to any Widget Area on your website by using the built-in Custom Menu Widget that ships with every WordPress installation. Now to keep things simple, WordPress only shows a few basic types of content for you to add to your menus: Pages, Links, and Categories. Don’t fret though. There is ALOT more you can do with your WordPress menu. Head on over to the Screen Options tab on the menu page and you’ll see a plethora of additional content options, such as Posts, Tags. Simply check the items you’d like to reveal on the Menu screen and a new box will appear from which you can add Menu items in the usual way.
Depending on other types of content created by Themes, Plugins or your own customizations, there may be dozens of possible content boxes shown in Screen Options for the Menu screen.
Opening Links In New Windows/Tabs
If you need a Menu item to open in a new tab or window – for example a link to your third-party online store – you can use the Open link in a new window/tab function. This checkbox is found just below the Navigation Label field when you click on the menu item and reveal its details. As you might have guessed WordPress hides this checkbox by default. So go back to the Screen Options and make it display. Look for Link Target under advanced menu properties.
Adding Custom Icons to Drop Down Menus
WordPress menu’s support multi-level structure, and as such you may wish to specify a custom symbol for the title of the parent menu item – thus letting your website visitors know that there are more options there. Some themes will automatically provide an indication that a Menu item has sub-items or child items. However if you’re theme doesn’t you can easily do this yourself by adding a symbol to parent menu items. By editing the Navigation Label – visible when you click on the box of a Menu item – just add an obvious symbol, such as + or > at the end of the parent item’s name. WordPress supports HTML within your menu labels, and as such you can use HTML entities to create all sorts of symbols.


