Blending Options are one of the first things Photoshop Novices stumble upon. The infancy of adding layer styles often leads to a short period of horrible drop shadows and cringeworthy bevels. Ironicly, this easily available styling is one of the harder things to master. Blending options is all about manipulating individual layers to obtain a certain effect. It’s a key aspect of creating icons, and will help you create textures, shading and highlighting.
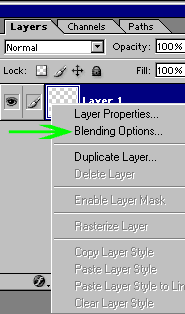
First, you need to open the Blending Options. Right click on your desired layer and choose Blending Options. Voila! Your blending options:

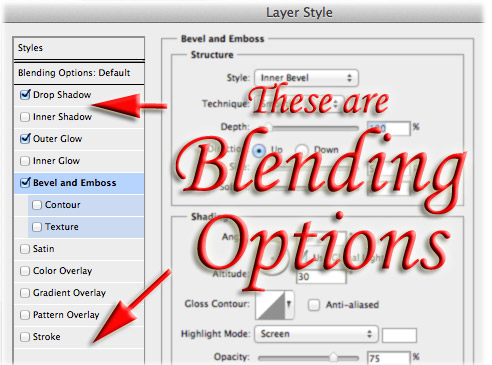
Ok, these are your available Blending Options. Remember, click on the NAME of the effect for more options for the effect.
Drop Shadow: Makes a shadow of the layer. You can customize shadow color, distance, size and other things
Inner Shadow: Creates a shadow inside the edges of the layers, makes it look like the layer is beveled, or cut out.
Outer Glow: Surrounds active layer in a glow. You can change the color, color type, size, spread, etc etc.
Inner Glow: Same as the Inner shadow, but with the same effect as the outer glow.
Bevel and Emboss: Give the active layer a “3-d” look.
Color: Gradient, Pattern Overlay: covers the entire layer with a color, gradient, or pattern.
Stroke: Outlines active layer.
These are just basic descriptions. The key to Photoshop is experimenting! Just screw around until it looks cool and to your liking. Here are a few examples: