In the previous WordPress tutorial we discussed the differences between using WordPress.com or WordPress.org; and since you’re here I am assuming you’ve decided to venture forth and setup your own self hosted WordPress installation. Luckily these days with most modern hosting providers offering one form or another of a one-click installer your job here will be pretty simple. If however your hosting provider doesn’t offer any sort of one-click installer don’t worry. I’ll cover how to manually install WordPress in a later tutorial.
Using An Installer: Softaculous
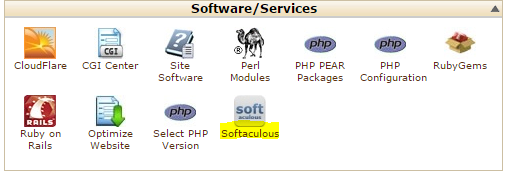
Softaculous is probably one of the more popular one-click installers these days and is incorporated into most cPanel based hosting plans. Look for the following icon once you login to your hosting accounts cPanel:
 Open up Softaculous and you should see a screen much like below – with WordPress being the first option most of the time:

Go ahead and hover over the WordPress icon and you will see an Install button appear. Click that and you will be presented with a page showcasing some information about WordPress, and allowing you access to a WordPress demo you can play with. Click the blue Install button to continue on to your installation.

Now you’re finally at the heart of your WordPress installation. The form you’re looking at now may seem a bit daunting at first however the majority of it is already filled out for you.

Within the Software Setup section you will want to first select if you’re website will be accessible via a standard HTTP connection or an SSL-secured HTTPS connection. If you’re not sure of this – leave it at the default HTTP selection. You can always change this later. Next up select the domain name you wish to install WordPress on, and then choose the directory it should be installed into. If you want your WordPress website to be accessed directly from your domain name simply leave the In-Directory field blank. Last in this section is the database table name – which Softaculous generates on it’s own. For security reasons you may wish to change this to something else. Just make sure to take note of what you named your WordPress database so that in the future you can easily distinguish it from your other databases.
Under Database Settings Softaculous sets the default prefix it will assign to all of your WordPress tables to wp_. Again for security reasons you may wish to change this, or merely leave it at the default.
The Site Settings section will setup your Site Name and Site Description – which is used by various WordPress themes. You can always change these settings later so don’t worry too much about picking the perfect site name and description right now. the Enable Multisite option will allow you to create a network of WordPress websites – and chances are that right now you’re not focused on this so simply leave this off.
Admin Account will create your initial administrator account for your WordPress install. DO NOT leave the default options here. Set a custom username, and click on the golden key icon next to the password field to generate a random password. If you wish you can also use the Rapid Purple Password Generator to create a safe password for your admin account. Lastly set the email address you want associated with this admin account.
Next up you can select the default language you wish to use for your WordPress install. To date WordPress has been translated into 40 different languages. Softaculous will default to English.
Within the Select Plugins option you will generally have the Limit Login Attempts plugin – which unfortunately is not selected by default. This plugin will lockout an IP address that has attempted to unsuccessfully login to your WordPress admin backend a certain amount of times. I would highly recommend you check this off and have it installed as it’s a great start to a secure WordPress installation.
Now we have either one or two more sections left – depending on how your hosting provider set things up. You will have the Advanced Options tab, and if your hosting provider has configured it – the Select Theme tab.

I generally leave these sections blank and don’t touch them at all. The first 4 options deal with updates and how they are handled. Disable Update Notifications lets you turn off email notifications about WordPress updates – and you want to keep things updated so a notification letting you know there is a new WordPress version available wouldn’t hurt. The next 3 options deal with Auto Upgrade – and most of the time you’ll want to keep this turned off. Sure it sounds convenient – a new WordPress/Plugin/Theme version comes out and Softaculous handles the entire update for you automatically. However what about those custom CSS changes you made on the old theme version? They’re now over-written. To avoid scenarios like this – handle your updates yourself. The last 2 options deal with Automated Backups – where Softaculous will automatically perform backups of your WordPress installation within specific intervals. While this is a great feature – I often run my backups myself and as such don’t want to get comfortable relying on something else.
The Select Themes option will showcase various themes that your hosting provider has enabled which are freely available from the WordPress Themes Directory. Selecting one of these will install WordPress with that theme enabled by default. Otherwise you’re WordPress install will default to the WordPress 2014 theme.
Now that we’ve gotten all of that covered – go ahead and press Install. Give it a minute and you’ll get the following screen:

You’re now all done! You’re WordPress website is all setup. Simply follow the link to login to your admin backend using the settings you specified earlier and start learning WordPress!