These bars can make great borders or backgrounds; with a few extra touches, they’ll spice up any page.
Create a new canvas, 400 x 100 pixels, with a transparent background. Choose any color as your foreground color (I used a nice dirty blue, hex value of #6699CC), then select the paint bucket tool  and fill the canvas with your color.
Choose pure white as your foreground color. Create a new layer by pressing the “Create new layer” button  . Select the rectangular marquee tool
  and select a portion of the canvas, 300 x 30 pixels. Now select the linear gradient tool
  and choose a foreground to transparent gradient. Drag a straight-line gradient from the left to right of the selection by holding down “SHIFT” as you drag.

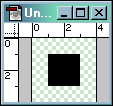 |
Make a new canvas, 4 x 4 pixels with a transparent background, and zoom into 100% so you can see what you’re doing. Now select the pencil tool  and select the smallest brush-size possible (1 x 1 pixels). Click on the four inner-most pixels to create a 2 x 2 black square. and select the smallest brush-size possible (1 x 1 pixels). Click on the four inner-most pixels to create a 2 x 2 black square. |
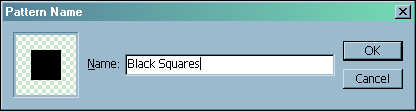
Now press “CTRL+A” to select the whole canvas, the select the “Edit>Define Pattern…”, and name the pattern what you will. You can close this new canvas with the pattern on it now.
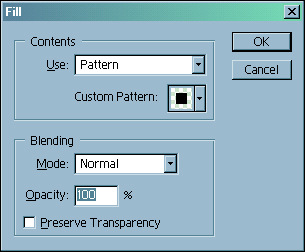
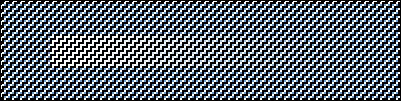
Go back to your original canvas, and create a new layer above the white transparent gradient. Press “SHIFT+BACKSPACE” to open the fill window, and choose to fill the layer with your new pattern, and the values shown below:
Now make a perfect selection of your pattern-fill by holding “CTRL” and clickig on the layer in the layers palette. Now press “SHIFT+CTRL+I” to inverse the selection.
Now activate the gradient layer, by clicking on it in the layers palette, and hit delete to clear the unwanted portions of the gradient. Deselect by pressing “CTRL+D” and delete the pattern-fill by right-clicking on the layer in the layers palette and selecting the delete option. You should be left with what’s left of the gradient.

This looks good, but by using some artistic touches, we can easily turn good in great! Select the eraser tool  at 100% opacity and a small brush size, and take out some of the squares on the faded side. Zoom in if you have to.

Almost there, just add some interest to the left side by choosing a much larger feathered-brush for the eraser (I used the feathered 65 pixel sized brush  , I suggest you use this too) and take an oblique slice out of the left side like so:

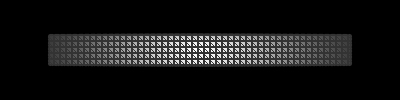
Lastly, this is a little dull, use the “Filter>Sharpen>Sharpen Edges” menu command to brighten things up.

Looks great, doesn’t it? Try using different color gradient and patterns to create different effects such as a decaying look or an interesting 3D look:

Really I impress your design of graphic. When I read your blog then I mean the work. Thanks for tutorial.
Clipping Path Service