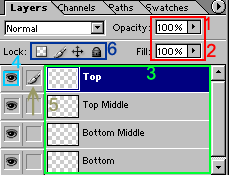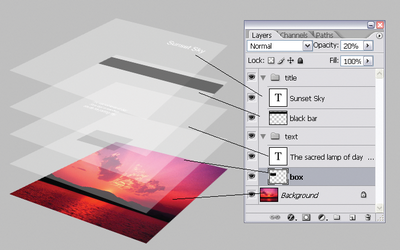
First thing to know about layers is what they are. Layers, simply put, are just the order your project is put in. Layers on the bottom will not go over something on the higher layers. Next, the Diagram: these parts are:
1, 2. Fill and Opacity: changes the transparency of the active layer (see also Transparency)
3. Current Layers: The one highlighted in blue is the layer you are currently working on. The boxes to the right are a small thumbnail of what’s on the layer.
4. Visibility: Simply turns the visibilty of the layer on or off. Click the eye to toggle.
5. Active Layer/Linked Layers: Indicator for the active layer and it’s linked layers.
6. Locks: From left to right Transparency Lock, Brush Lock, Move Lock, Lock all. Transparency lock locks the pixels transparency so that when you paint a pixel it’ll keep the same transparency rather than being colored over. Brush Lock, not the actual name, locks the layer so no more editing can be put on…prevents more drawing and such. Movement, objects in the current layer cannot be moved. Lock all, locks all.
Basic Layer Info.
Layers are a way of ordering your your project. Why layers are important: You can add different Blending Options to different Layers, you can order your layers so that one layer appears “behind” or “under” another layer, and they used for keeping seperate objects by themselves, so you edit the object, and not the whole image.
Odering Layers
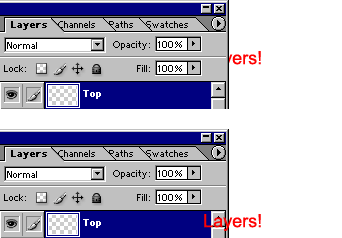
First, the layers that are at the bottom of the list are the layers that appear behind the rest of the image. To move a layer, click and hold the layer and drag it above the layer you wish.

As you see in the picture above, the word layers was behind the picture, but when I moved the Layers! Layer up, it is now above the picture.

I’m layer mask experts. I think your method is very easy and it’s best for beginner. Thanks for sharing.